

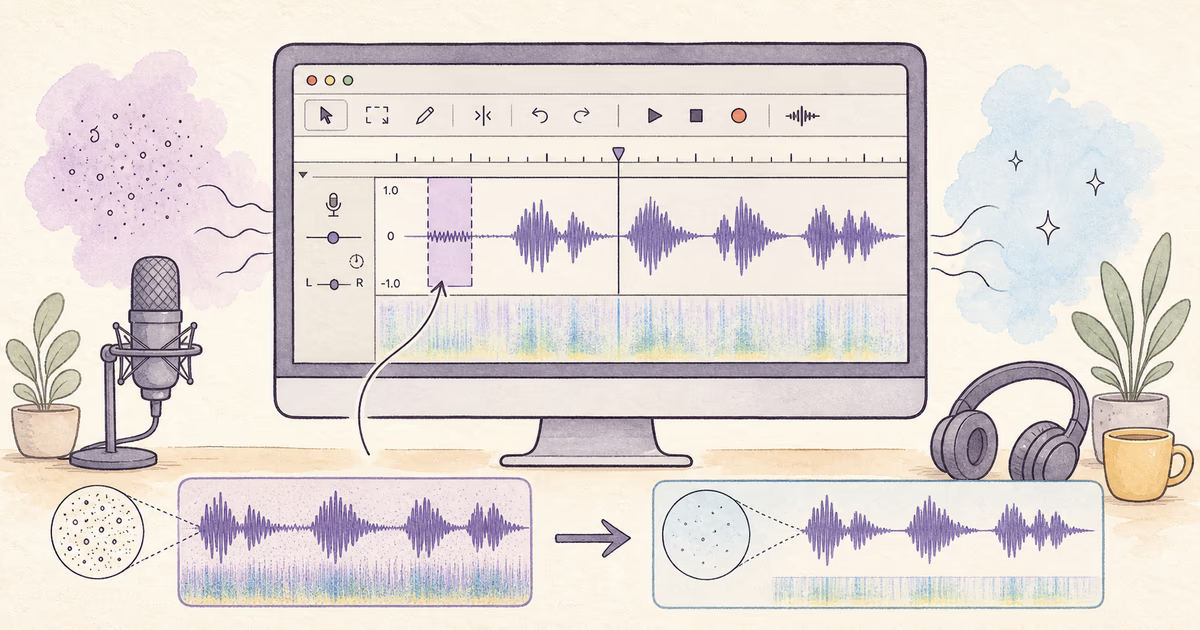
To remove background noise in Audacity, select a passage that contains only the steady noise, get a Noise Profile, select the audio you want to clean, then preview the Noise Reduction effect before applying it. Use the smallest effective reduction and undo the change if speech becomes metallic or incomplete.
Audacity is a good manual option when you need control and can identify a stable noise sample.
Audacity noise-reduction steps
The current Audacity Noise Reduction manual gives this two-stage workflow:
- Open the original audio in Audacity.
- Save the project or work from a copy.
- Find a section that contains only the unwanted steady noise.
- Select that section.
- Go to Effect > Noise Removal and Repair > Noise Reduction.
- Select Get Noise Profile.
- Select the audio that needs cleanup.
- Open Noise Reduction again.
- Preview the result and adjust cautiously.
- Apply the effect only when speech remains natural.
Menu labels can change in a future Audacity release. Use the linked official manual when your installed version looks different.
Choose the right noise profile
The profile teaches the effect what to reduce. Use a passage with the same steady noise heard under speech, but no speech or music.
A useful profile can contain:
- Constant fan noise.
- Broad hiss.
- A stable hum or buzz.
- A steady high-pitched whine.
- Consistent room equipment noise.
Do not use a breath, a quiet word, or a section from a different room. If noise changes during the recording, one profile may not represent the complete file.
Audacity states that a longer valid noise profile is better than a very short one. Duplicating the same tiny sample does not add useful statistical information.
Noise Reduction settings in plain language
Audacity provides controls for the amount and character of reduction. Start cautiously and use Preview.
- Noise reduction controls how much identified noise is reduced.
- Sensitivity affects how much audio is treated as noise.
- Frequency smoothing changes how reduction is distributed across nearby frequencies.
Higher values are not automatically better. Strong settings can remove consonants, breaths, and quiet word endings. The correct setting is the least change that makes the main distraction acceptable.
Check speech before you apply
Use a passage that contains normal and quiet speech. Compare the preview with the unprocessed source at a similar playback volume.
Listen for:
- Complete S, F, T, and K sounds.
- Stable word endings.
- No watery or metallic texture.
- No pulsing between phrases.
- Less noise while someone talks.
- The same speaker identity.
The effect can make silence sound clean while damaging active speech. Judge the words.
What Audacity Noise Reduction is designed for
The official manual describes the effect as suitable for constant sounds such as hum, whistle, whine, buzz, hiss, tape hiss, fan noise, and similar steady sources. It states that the effect is not suitable for individual clicks and pops or irregular noise such as traffic and an audience.
For one click or a short defect, use a precise repair or edit. For a narrow stable electrical tone, Audacity suggests that a Notch Filter can help. Do not use a strong whole-file process for a local fault.
A faster online alternative
Audacity is useful when you want manual control and have time to choose a profile. An online preview is useful when you want to test a spoken recording without installing or configuring an editor.
With SoundClean, you can upload MP3, WAV, FLAC, M4A, OGG, MP4, M4V, or MOV. Compare a cleaned preview with the original before you process the full file.
This is not a claim that one tool wins for every source. Choose Audacity for detailed local control. Choose a browser preview for a fast test on common speech recordings.
Audacity workflow by use case
Podcast
Use separate host and guest tracks. Capture a profile from each noisy track rather than processing a clean speaker. See Clean Podcast Audio.
Interview
Keep the original for exact quotes. Test the quietest important answer, not only the loud interviewer. See Clean Interview Audio.
Screen recording
Extracting audio adds a workflow step. If you use Audacity, preserve start time and duration before replacing the track. A direct video option is in Clean Screen Recording Audio Online.
Voice note
Use the original file. If the noise changes because the phone moved, test several regions instead of one global profile.
Troubleshooting
“Not enough audio selected” appears
Select a longer noise-only passage. Audacity requires enough samples to calculate the profile.
Speech sounds metallic
Undo the effect. Use a more representative profile and lower settings, or accept more background noise. Do not apply another strong pass to the damaged output.
Noise changes over time
Divide the recording into logical sections only when needed. Create a suitable profile for each distinct condition. Avoid abrupt changes at edit boundaries.
Traffic remains
Traffic is irregular, and Audacity states that profile-based Noise Reduction is not suited to it. Test another workflow or edit the worst events locally.
A pure tone remains
Test a narrow notch filter on a copy. Check that the voice or music does not lose body.
Related reading
- How to Clean Up Audio Online
- Remove Background Noise from MP3 Online
- Remove Static from Audio Online
- Best Audio Cleaner Software
FAQ
How do I remove background noise in Audacity?
Select a noise-only passage, get a Noise Profile, select the target audio, reopen Noise Reduction, preview, and apply only when speech remains natural.
What should I use for a noise profile?
Use a section with only the same steady noise heard under speech. Do not include voice, music, or a different recording condition.
Can Audacity remove traffic or audience noise?
Audacity states that profile-based Noise Reduction is not suitable for irregular traffic or audience noise.
Why does the result sound metallic?
The reduction may be too strong, the profile may be wrong, or the noise may overlap speech. Undo and use a more cautious workflow.
Compare a browser preview
If you do not need manual profile control, upload the original to SoundClean and compare a cleaned preview before full processing.